Showing posts with label DIY. Show all posts

Thursday, February 7, 2013

Insta-Catch Up?!??

I will apologize in advance for the phone photo overload that is coming. I should have split this up into two posts but I figured why not just go ahead and catch up and be ahead of the game... right? Haha.


Checking out the "bok boks" at Nanny and Pop's house. She is obsessed with chickens... she may be a very happy little girl very soon. That's all I can say about that now! :)


Petting one of the baby goats. My pawpaw has 36 goats. 14 of them were born last week! Crazy! We actually saw a mommy goat give birth to number 15 while we were there. That was.... interesting with the boys. Ha!


Just sliding!


Movie time!


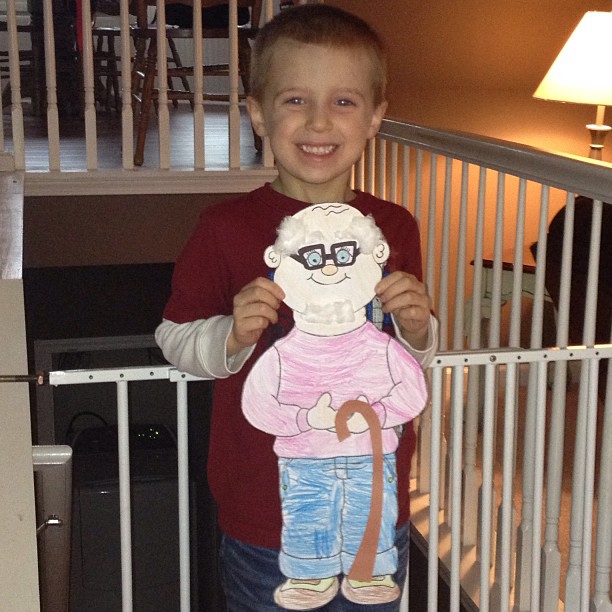
Lucas holding his project for the 100th day of school. It is what he will look like when he is 100 years old.


My burlap rag wreath I made. I think it is missing something. Any tips?


Can you find the baby??


Once again with the chickens...


Dress up time!


Monday, September 10, 2012

ONEderland Party!

I know, I am SO late posting this. I'll tell you what happened: Life. That's my excuse! HA!

Paisley had a ONEderland party for her first birthday. We totally based it off of the Disney movie, Alice In Wonderland. I turned out just precious if I do say so myself. :) Birthday's are a big deal in my opinion, especially for kids. So when she turned one I knew we had to do it right!


 We covered a board with white paper and added all of her monthly photos to it. In the center is a photo from her one year shoot I did. I am so glad I took the time to take a monthly photo now! I also made the banner out of some scrapbook paper I found on sale, some white cardstock, and we used the cricut to cut put glitter letters.


 This was the gift table. I made so many of these pompoms that I could do it in my sleep now.


 I put this book beside the door when you walked in. We had some white roses that I had painted red (of course). I also bought Happy Birthday to You! by Dr. Seuss and asked that everyone please sign it. I think she will appreciate this when she turns sixteen. That IS another major birthday for a girl.


 The chalkboard is just a tray from the Dollar Tree that I painted with chalkboard paint.


 The favors were tea cookies in clear plastic bags and we tied on some Thank You labels.


 Told you I made a ton of tissue balls. I think they add a lot to the room and it is a cheap project!


 Her cake was so amazing that it pained me to even cut it. How gorgeous!


 We also had some random photos from her first birthday shoot spread all over the room. Of course the tea cups and saucers!


I made this poster board at the last minute after I saw the idea on pinterest.


 This was just before you walked into the room. It was my favorite quote and I knew we had to use it!


Arrows on the rails read: This Way, That Way, Up, Down, Wrong Way, and Off With Your Head!


 The food table!


 The kids had Mondos to drink. We tied on some labels that read: Drink Me.


The drink table! We used a fountain for the tea.


 I originally made this to hand on her high chair but it didn't lay right. So we taped it to the front of the gift table!


Her smash cake. AHH!

Whew! That was a lot of pictures. If you made it all the way through, that wasn't all of them! HA! I will be doing a separate post and it will contain photos of Paisley at her party.

~Nicole

Wednesday, June 13, 2012

DIY End Tables


After years of begging my husband to paint our living room, he finally caved. When he did of course I had to come up with a new color scheme. Blue being my favorite, I knew it had to be incorporated. A lot. My curtains are a pretty blue color and I figured I needed more elsewhere. The end tables we had were hand me downs. We were like the fourth family they had been through. I decided it was time to find some new "old" ones. My favorite little thrift store in town did not disappoint. It took several weeks, but sure enough my mom called me on a random trip there and said she had found them. I took them home for about twenty bucks.


This is the before. They had glass tops and that is not what I had in mind at all. I wanted wood ones...

So we got to work. We took the glass out and my husband cut some wood to fit in it's place. He glued it into place and used some wood filler to fill the gaps. We sanded the table tops completely since I had planned on staining them.

I painted the legs a beautiful robins egg blue. I purchased the paint that already had primer in it and it saved me a huge hassle. I always do that. I only brushed on one coat. I didn't want it to look perfect.


Love the detail in the legs... I used the same dark stain that we had used on the tops and brushed a light coat over the blue. Every time I would brush some on I would immediately wipe it off with a paper towel. This was the result and it is exactly what I had in mind.


I love them, I think they look amazing sitting in the living room. (Please excuse the monster trucks, I had a fussy baby on my hip and was in a hurry). :)


I'm Linking Up:

Feature Yourself Friday @ Fingerprints on the Fridge
Saturday Night Special @ Funky Junk Interiors
Weekend Wrap Up @ Tatertots and Jello
The Sunday Showcase @ Under the Table and Dreaming
DIY Project Parade @ The DIY Showoff
Monday Link Party @ Craft-O-Maniac